How to move Magento 2 to new domain
February 22, 2023
Introduction to Consent Mode V2
March 11, 2024Introduction:
Integrating Meta (formerly Facebook) Pixel with your Shopify store is a crucial step for enhancing your e-commerce marketing. This guide will walk you through the process of adding Meta Pixel to Shopify using Customer Events, helping you track conversions and optimize your ads.
Steps:
1. Access Shopify Settings:
Navigate to your Shopify admin panel. Go to 'Settings' and then select 'Customer Events'. Here, you'll find the option to add a custom pixel.
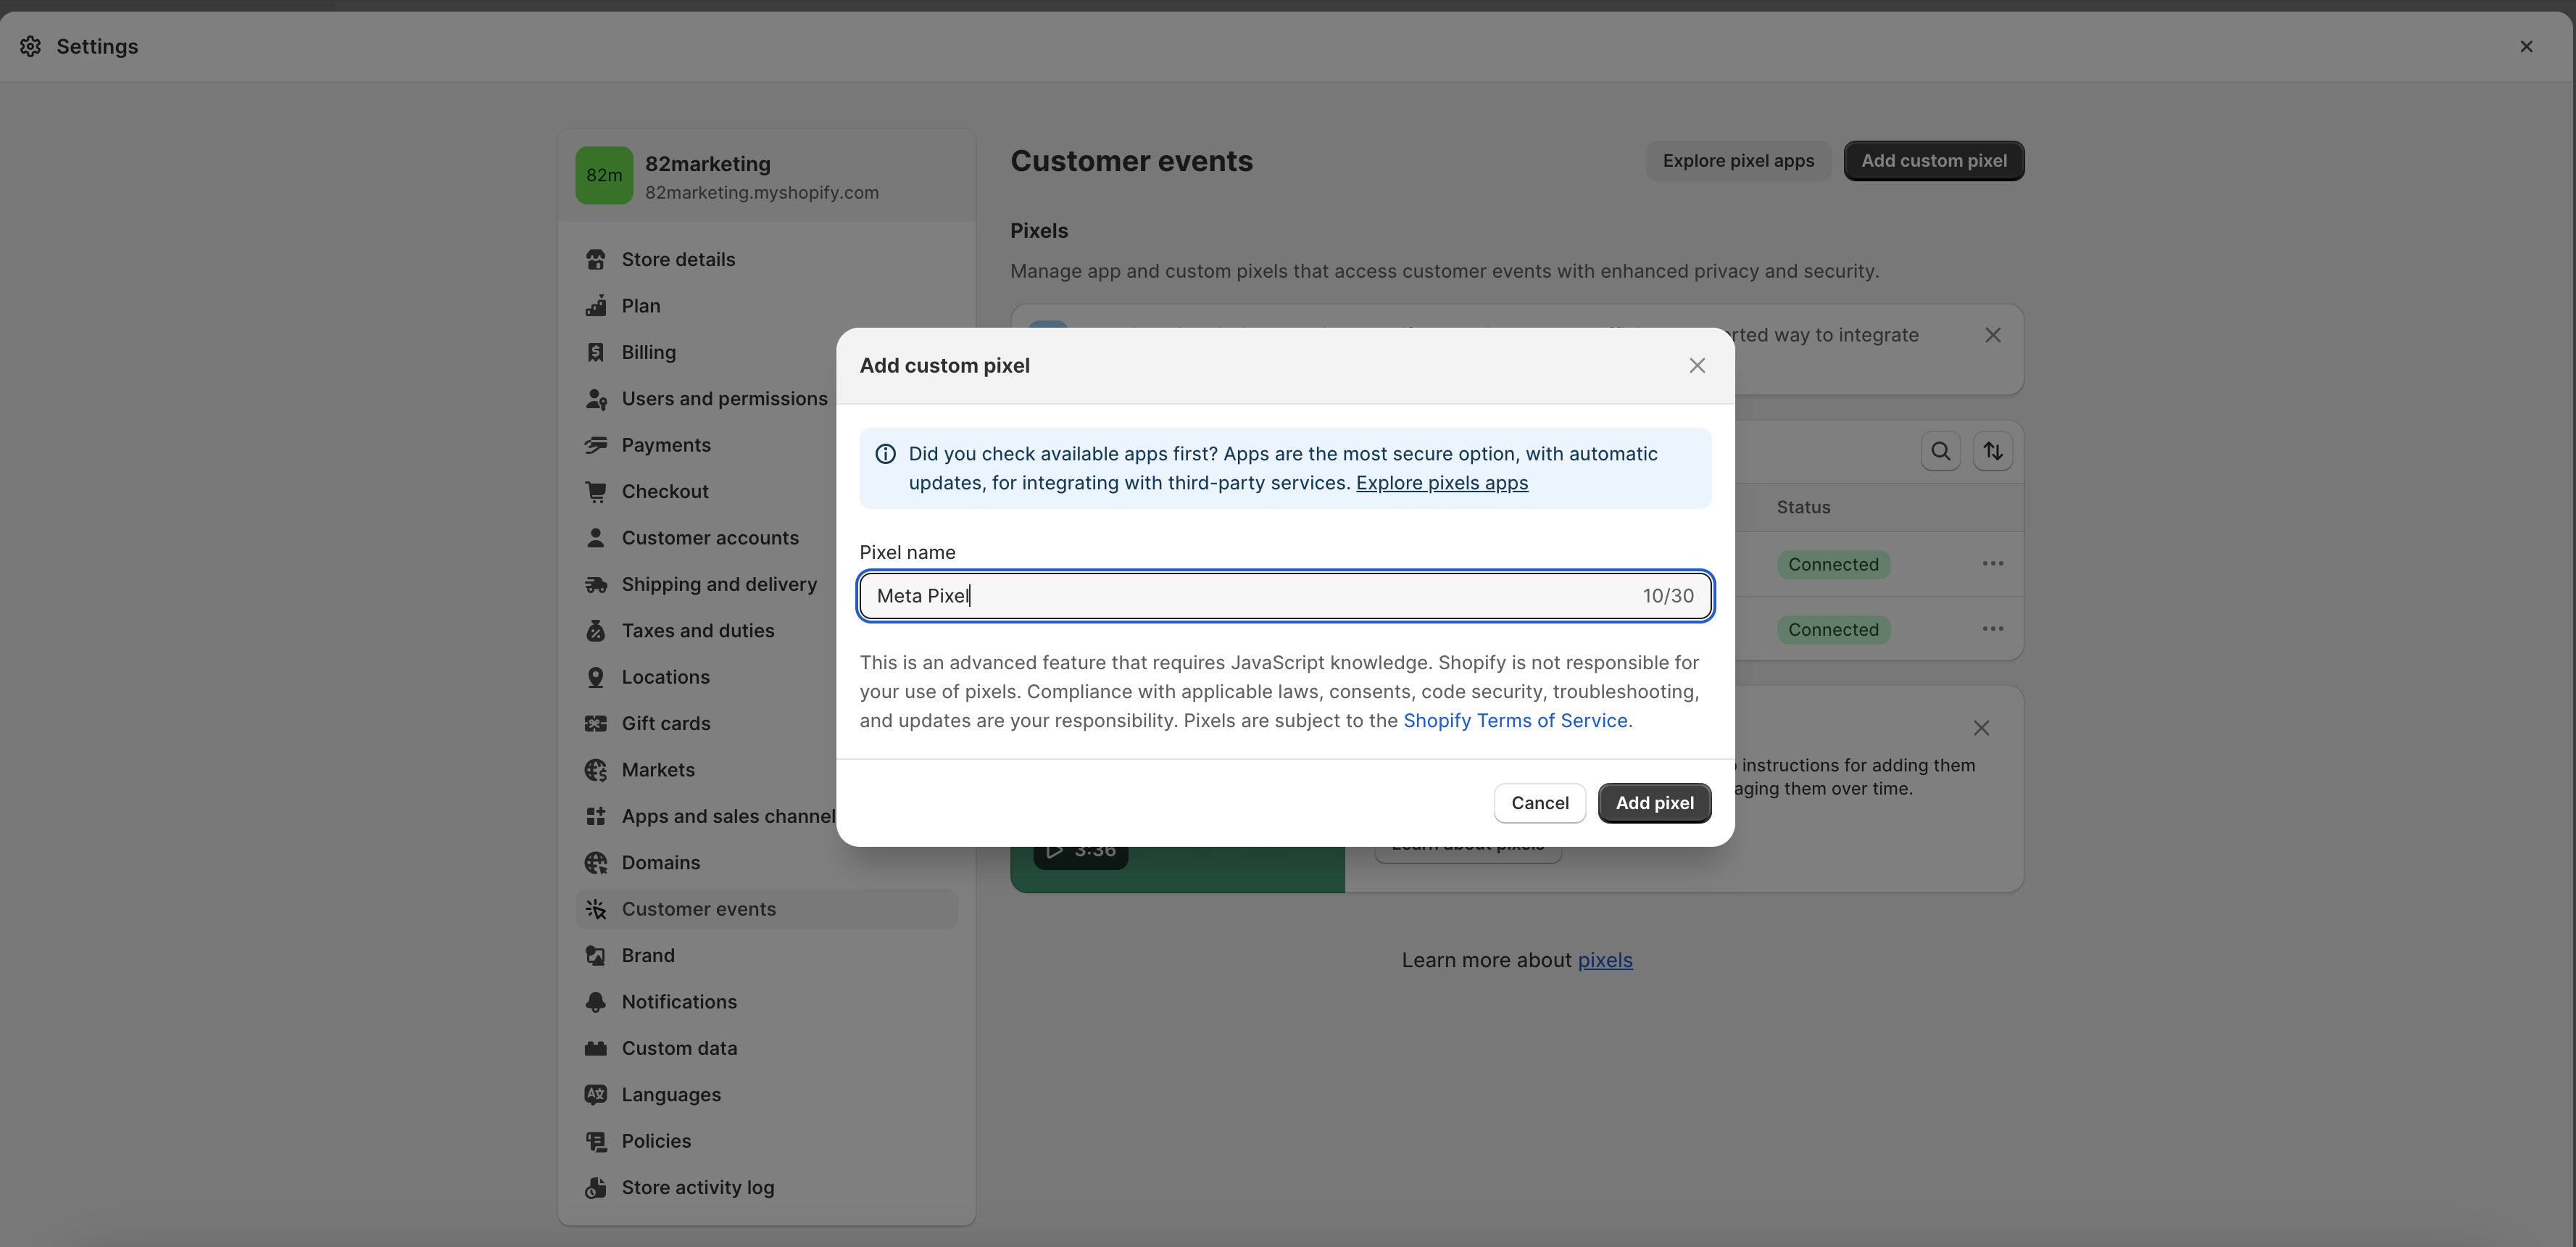
2. Insert Meta Pixel Code:
In the 'Customer Events' section, click on 'Add Custom Pixel'. You will need to paste below code in the provided field. Ensure you replace 'YOUR_PIXEL_ID' in the code with your actual Meta Pixel ID.
!function(f,b,e,v,n,t,s)
{if(f.fbq)return;n=f.fbq=function(){n.callMethod?
n.callMethod.apply(n,arguments):n.queue.push(arguments)};
if(!f._fbq)f._fbq=n;n.push=n;n.loaded=!0;n.version='2.0';
n.queue=[];t=b.createElement(e);t.async=!0;
t.src=v;s=b.getElementsByTagName(e)[0];
s.parentNode.insertBefore(t,s)}(window, document,'script',
'https://connect.facebook.net/en_US/fbevents.js');

// replace YOUR_PIXEL_ID with the pixel ID provided by third-party
fbq('init', YOUR_PIXEL_ID);

// integrate third-party pixel tracking
analytics.subscribe("page_viewed", (event) => {
  fbq('track', 'PageView');
});

analytics.subscribe("product_viewed", (event) => {
  fbq('track', 'ViewContent', {
    content_ids:  [event.data.productVariant.id],
    content_name: event.data.productVariant.product.title,
    currency: event.data.productVariant.price.currencyCode,
    value: event.data.productVariant.price.amount,
  });
});

analytics.subscribe("product_added_to_cart", (event) => {
  fbq('track', 'AddToCart', {
    content_ids: [event.data.cartLine.merchandise.id],
    content_name: event.data.cartLine.merchandise.product.title,
    currency: event.data.cartLine.merchandise.price.currencyCode,
    value: event.data.cartLine.merchandise.price.amount,
  });
});

analytics.subscribe("payment_info_submitted", (event) => {
  fbq('track', 'AddPaymentInfo');
});

analytics.subscribe("checkout_started", (event) => {
  fbq('track', 'InitiateCheckout', {
    content_ids: event.data.checkout.lineItems.map(item => item.id),
    currency: event.data.checkout.currencyCode,
    value: event.data.checkout.totalPrice.amount,
  });
});

analytics.subscribe("checkout_completed", (event) => {
  fbq('track', 'Purchase', {
    content_ids: event.data.checkout.lineItems.map(item => item.id),
    currency: event.data.checkout.currencyCode,
    value: event.data.checkout.totalPrice.amount,
  });
});
3. Establish Connection:
After inserting the correct Pixel ID, click on 'Connect'. This action links your Meta Pixel with your Shopify store, enabling it to start tracking visitor activities.
Conclusion:
Setting up Meta Pixel on your Shopify store is a straightforward process that can significantly impact your marketing efforts. By following these steps, you can track user interactions, understand customer behavior, and optimize your advertising strategies more effectively.
